Today, more and more electronic devices are acquiring “intelligence” and becoming indispensable helpers in solving ordinary everyday tasks. Since the work of any smart functions is based on downloading information from external servers (video content, pictures, photos), using Smart-TV on Samsung, Philips, Sony, LG is impossible without an Internet connection. The article will tell you how to connect your TV to the Internet and prepare the operating system for use.
Older (kinescope) TV models do not have the ability to directly connect to the World Wide Web and require the use of special smart set-top boxes, while most modern TV devices have chipsets that support direct Internet access. These models can be connected using one of the following methods.
We use a LAN cable

It should be said right away that cable connection is the most complex connection method and requires the most effort from the user. But the method will help a lot if the TV does not see the Wi-Fi access point.
To implement access to the network, you will have to run an additional cable into the room - the so-called twisted pair cable. An Ethernet link cannot be split into several digital streams and serve more than one device at a time (a network hub will help out with this problem and provide alternate data transfer).
Laying the necessary wires even at the stage of construction or repair work does not give one hundred percent guarantee of a successful connection. Some domestic providers work with network standards (using fiber optics), which are not supported by every smart TV model (for example, L2T is not compatible with Korean technology).
The only benefit of using a cable is the quality of the internet connection. The wired channel creates a minimum amount of noise, which favorably affects the speed of information exchange.
So, to connect you need:
- Plug the Ethernet cable into the TV's LAN port.
- In the network connection settings, select "Wired" type.
- Wait until the settings are saved and restart the TV.

In some cases, you will need to contact the technical support of the provider with a request to register the MAC address of the TV device in the registry. The identifier is used to protect the subscriber from unauthorized access.
Through a router
If the TV cannot access the network wirelessly, you can use the LAN port of the router (ADSL modem). It will distribute WiFi to the TV device not over the air, but through an Ethernet cable.

Among the advantages of the method:
- Ease of implementation. If the apartment already has a router with wireless access to the Web, then the user just needs to connect the TV and the router with a regular patch cord. No manipulations with carrying out additional peripherals and registering a new device in the provider's registry are required.
- Ease of operation. The owner will not experience any discomfort due to the "busy" network. Wireless distribution of WiFi and wired Ethernet connection of Smart-TV in this case do not interfere with each other.
- Data exchange rate. Theoretically, the speed of the Internet connection on a TV device will be higher than on other user gadgets connected to a WiFi network. The actual speed depends on the processor built into the TV.
The connection algorithm will look like this:
- The router and TV set are connected by a cable via LAN.
- The user starts synchronization of devices in automatic mode through the network settings menu.
- In the event of a failed auto-installation, you will have to resort to manually entering the parameters and enter the IP address and DNS yourself. If you buy a router from a provider, all the necessary information will be contained in the contract or in the memory of your home computer (section "Login and password").
- Save the new settings and reboot the device.
After completing this simple procedure, Smart-TV will connect to the Global Web.
Via WiFi

WiFi connection is the most common option for accessing the Internet on any gadget. The connection is made over the air and does not require the purchase of special wires. Thanks to this, the user can complete the initial connection in a matter of minutes, as well as save himself from the need to hide cable peripherals from the eyes of household members in the future. It is worth saying that for an air connection, the TV must have a built-in WiFi module.
To set up, follow the step-by-step instructions:
- Using the remote control, open the network settings (usually they are indicated by a globe icon).
- Select a wireless connection method.
- "Click" on the desired wireless network in the list of SSID points that appears.
- Enter the password for the access point on the TV device and save the settings.
You may also need a special router for the TV: if the device does not have a built-in WiFi antenna, you cannot do without an external USB receiver, which will act as an intermediary in data exchange between the home router and the TV set. Such an accessory can be purchased at most retail stores for several thousand rubles, but it should be noted that the mini-router must be compatible with the TV. For example, LJI's webOS only supports Internet accessories from this manufacturer.
Settings for Smart TV
To start using Smart-TV, you need to set up the operating system of the TV device. Register an account in a proprietary system, personalize a smart hub and download a package of basic applications. Since devices from Samsung, LG and Sony are the most popular, and each of the listed manufacturers has its own TV OS, three instructions for starting smart TV operation will be presented below.
LG

Television devices from LV work under the control of proprietary webOS. To set up the operating system, you will need:
- Launch the menu and click on the user account icon in the upper right corner.
- To create a new profile, select "Register".
- We indicate the real Email address, enter the password and be sure to check the box "Stay signed in". Thus, you do not have to log in every time after rebooting the TV set.
Entering additional information about the owner is optional, so you can skip this step. After identification is completed, it will be possible to download applications and widgets from the LG Apps store.
For more details about the details of the process, read this one, there is also a step-by-step video instruction.
Samsung

To set up Samsung SmartHub:
- Register a personal account in the manner described in the previous section of the article. Only some icons may differ, the purpose of which should be intuitive for the user.
- Check the performance of the connection by launching any of the standard applications.
- Start personalizing the hub. Downloading applications is done through Samsung Apps, and moving widgets around the hub screen is done using the remote control.
It is worth saying that after completing the registration, the specified password and Eeshka will no longer be needed, mail can be forgotten. Re-entry is not required.
Read more about Samsung in this.
Sony
Accessing smart features on Sony TV devices is as follows:
- on the remote control, you must press "Home";
- in the upper right corner, select "Settings" (the third icon from the right);
- in the "Network" section, click on "Update Internet Content";
- personalize your Sony Entertainment Network (SEN) hub.

The SEN key on the remote control is used to further user access to smart applications. Although Bravia's interface can hardly be called concise and intuitive, anyone can handle setting up Smart-TV.
Conclusion
So, connecting the TV to the Internet is divided into two stages: providing the device with access to the network and setting up the operating system to use the web browser and other Internet applications. To connect to the Global Web, it is better to use the WiFi interface, since this option is optimal in terms of its implementation and further operation, and purchasing an external USB antenna is much easier and, perhaps, even more profitable than bringing an additional Ethernet cable into the apartment.
Now you can open any application, use a browser, transfer video via Wi-Fi to a TV. You don't need a flash drive anymore!
Video
Smart TVs are no longer a rarity. Smart devices allow not only watching TV channels, but also installing applications on them, surfing the World Wide Web, connecting portable drives, and synchronizing with mobile gadgets. Many Smart TV features can only be accessed when the TV is connected to the Internet.
What you need to connect the TV to the Internet via Wi-Fi
In general, a smart TV can be connected to the Internet in two ways:
- via a network (LAN) cable,
- via a Wi-Fi network.
Since the first option usually does not cause any particular difficulties for users, it is worth dwelling on a Wi-Fi connection in more detail. To do this, you need a router that is already connected to the global web and configured to distribute via Wi-Fi, as well as Smart TV with support for the appropriate connection. Whether there is Wi-Fi support on board your device, you can find out by studying the technical documentation for the TV (including on the official website of the manufacturer).
Scheme of connecting Smart TV to the Internet via Wi-Fi
Most modern TVs with Smart TV function have a built-in wireless module. Some devices may not have such a receiver, but it is possible to connect an external Wi-Fi USB adapter. And all smart TVs have a LAN port, which makes it possible to connect via cable, and also organize a Wi-Fi connection. The latter option, however, requires the purchase of an additional network cable (patch cord) and a router (repeater) with the ability to work in adapter mode.
- Connecting a Smart TV with a built-in wireless module to the Internet is not difficult and does not differ in anything (except for the nuances of settings) from connecting to a network via Wi-Fi on a smartphone or tablet. More detailed setup instructions for TVs of different brands later in the article.
Scheme of connecting to the Internet of a smart TV with a built-in Wi-Fi module
- If your TV does not have a built-in module, but it supports Wi-Fi, you will need to purchase an external USB adapter. It is strongly recommended to purchase branded Wi-Fi devices suitable for your TV model. You can get information about supported hardware on the official website of the manufacturer. The adapter should simply be inserted into the USB port. No drivers or additional settings are required. For those who are not looking for easy ways and want to save money (branded adapters are still quite expensive), you can try your luck with Chinese clones, whose performance no one guarantees.
Scheme for connecting Smart TV to the Internet using a Wi-Fi adapter
- The third option is more complex. Many modern routers can function in adapter mode (among the inexpensive ones are Netis, Totolink routers). You need to connect the device's LAN port to the TV's port of the same name with a patch cord and switch the router to adapter mode (instructions for this setup for different models can be found on the Internet). Please note that the TV itself is configured as in the case of wired Internet.
Scheme for connecting a smart TV to a Wi-Fi network through a router
After connecting Wi-Fi, your Smart TV connection is configured.
Setting up a TV connection to the Internet via Wi-Fi
To connect to a Wi-Fi network, you need to know its name (SSID) and password (if the network is closed).
Connecting Samsung Smart TV
This manual is designed to set up the Internet via Wi-Fi in Samsung TV models of the M, Q and LS series. Network settings for Samsung Smart TVs of other series may differ from those suggested.
- You need to enter the Samsung Smart TV settings: to do this, press the Home button on the remote control and select "Settings" on the TV screen.
Menus may look different on Samsung TV models from other series.
- Select "General" from the list of available settings.
In the "General" menu, you can configure other functions
- In the drop-down list, move to the "Network" line and select this item.
The "Network" menu gives access to the network settings of the TV
- Select the line "Open network settings".
Here are the network settings configurations for connecting to an available network
- Next, you need to select the type of network, in our case - "Wireless".
You must select the Internet connection you are using
- Now you should wait until your Smart TV finds available Wi-Fi networks and select yours.
Selecting a wireless connection
- An on-screen keyboard should appear on the TV. Enter the network password and click Finish.
To see which password you have entered, check the "Show password" box. password"
- After the connection is completed, click OK.
If you have problems connecting to network services, contact your ISP
Connecting to an open Wi-Fi network is done in the same way, but without entering a password.
LG TV setup
First of all, refer to the "User's Manual" of your TV to make sure that your model has a built-in WiFi receiver. In the absence of the latter, the connection is made using the proprietary LG AN-WF100 adapter (which can be purchased separately).
- If there is an available wireless connection, "Network Setup: Wireless" should appear in the settings menu. Select it by pressing the OK button on the remote control.
Before connecting, you need to set up an access point
- We make settings from the list of access points (AP) by pressing the button of the same name.
In the window that appears, select the desired connection method
- In the list of available WiFi networks that appears, select your access point.
Scanning may take some time
- Next, you need to enter a password using the on-screen keyboard and remote control. Enter.
After confirming the choice of a secure access point, you will be prompted to enter a password
- The wireless network to LG Smart TV is successfully connected.
Additional network connection information is also displayed.
Internet connection TV Sony Bravia
Before setting up, make sure that your router distributes Wi-Fi. You can check it with any other device. Connecting the TV to Wi-Fi using a security key is as follows.
- Go to the Sony Bravia menu, find the Network button. Remote control: Home button, selection.
Find the menu item Network
- Then select Wireless Setup. The network setup will start.
Select network setting
- Activate the Scan button. Let's wait until the system finds a list of available networks, and select the required one.

The key is required for a secure connection
At the end of the settings, you will be prompted to save the entered data. This is necessary so that each time you do not type the password again.
Possible connection problems
From the step-by-step instructions, it can be seen that connecting Smart TV to the Internet via Wi-Fi is not difficult. If the algorithm is followed, users, as a rule, should not have any questions. In a different situation, it is recommended to study the "User's Guide" for your TV in more detail. Problems not resolved in this way are usually fixed by calling a specialist, but first you can try to deal with the problems on your own.
There may be many reasons for problems with connecting Smart TV to the Internet via Wi-Fi, ranging from improper connection and configuration of network equipment or TV to problems with software or services, as well as ways to solve them. Let's dwell on the main malfunctions and options for their elimination.
Table: main malfunctions and their solution
To avoid many connection problems, place the router in direct line of sight from your Smart TV and away from sources of electromagnetic radiation (microwave ovens, phones), so you will avoid interference from these devices on the Wi-Fi module.
Video: how to connect Smart TV to the Internet via Wi-Fi
Connecting Smart TV via Wi-Fi is a convenient option, as it eliminates the need to pull (sometimes through the entire apartment) a network cable from the router. However, with a slow Internet, this solution cannot be called successful, since during wireless data transfer, speed losses can be significant - so much so that it may not be enough for comfortable viewing of streaming television.
Progress does not stand still and now on TV you can not only watch terrestrial television, but also surf the Internet, watch online movies. By their architecture, modern TVs can be compared with computers; they have a processor, RAM. But to use all the features of a modern TV to the maximum, you need to connect the Internet, a home computer, a sound system, and the like to it. In this article, I would like to touch on one of the main features of the TV - Internet access, namely, ways to connect the TV to the Internet.
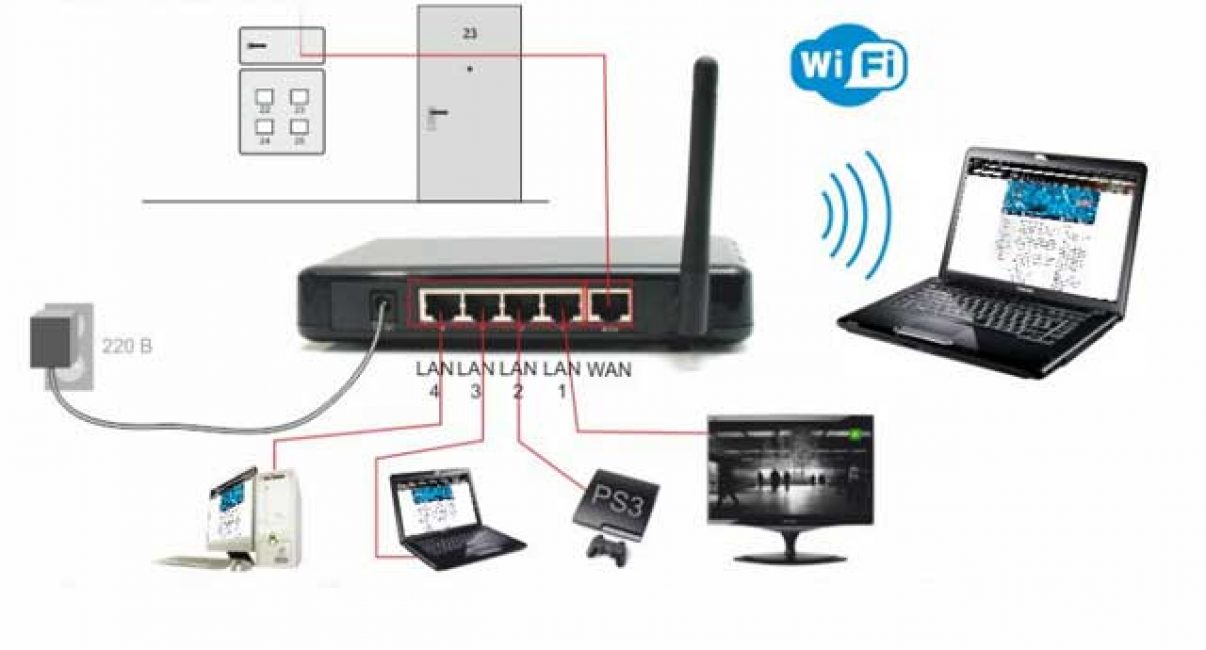
Connect your TV to the Internet using a network cable.
The most traditional way to connect a TV is through a network cable. Traditionally, this scheme looks like this - the provider's cable is connected to the router, and cables are already coming from the router to connect to a TV, computer, laptop, etc.
To connect, a network cable (patch cord) of the required length is purchased and connects the TV and the router.


If you have not made any changes to the settings, then thanks to this method, the Internet on your TV will be configured automatically, i.e. you can immediately launch smart TV and enjoy the Internet on TV.
The advantages of this method:
Does not require configuration when connected.
Cons of the method:
Requires the purchase and installation of a cable, which is sometimes difficult.
Connecting the TV to the Internet using Wi-Fi.
Another popular way to connect your TV to the Internet is via a wireless Wi-Fi network. The traditional scheme looks like this - the provider's network cable goes to the router, and the router already distributes the Internet via Wi-Fi.

If you do not have Wi-Fi on your TV, you can purchase a Wi-Fi adapter for this.

Attention!!! It is worth emphasizing that the purchase of a Wi-Fi adapter is suitable if the TV supports this wireless technology. This should be indicated by a line in the instructions for the TV- WiFi Ready. In addition, you need to purchase a Wi-Fi adapter specifically for your TV model, which Wi-Fi adapter model is suitable, you will find out from the attached instructions for the TV or on the TV manufacturer's website.
Pros of this method:
Without laying a cable, you connect your TV to the Internet.
Cons of the method:
If your TV does not have Wi-Fi, you need to purchase a Wi-Fi adapter.
Connect your TV to the Internet using a Wi-Fi hotspot.
If your TV does not support Wi-Fi, and you do not want to pull a network cable across the room, you can connect the TV using a Wi-Fi access point. Those. you have a classic picture - the provider's network cable is connected to the router and distributes the Internet to all devices via Wi-Fi. A Wi-Fi access point allows you to convert a Wi-Fi signal into an electrical one and "run" it through a network cable. By the way, it is not at all necessary to buy a new Wi-Fi access point, another Wi-Fi router may be suitable for these purposes, provided that it supports the CLIENT connection mode.

Pros of this method:
No cabling required.
Cons of the method:
Wi-Fi access point or Wi-Fi router operating in CLIENT mode is required.
Connecting your TV to the Internet with HomePlug AV technology
Another way to connect your TV to the Internet is to use the HomePlug AV adapter. What the HomePlug adapter is AV technology is an alternative way to connect network devices using normal home/office wiring as a data carrier. Read more about how it works in the article. Internet / local home network via socket. HomePlug AV Technology . So, the essence of the method is as follows - you purchase two HomePlug AV adapters, for example TP Link PA2010. You connect one near the Wi-Fi router and connect it with a network cable to the router, the second near the TV and connect it with a network cable to the TV. You set up a network between HomePlug AV adapters, since this is done with the push of a button, and voila, your TV is connected to the Internet. It is worth noting that HomePlug AV adapters are cheaper to purchase as a set consisting of two pieces at once.

Advantages of the described method:
No need to pull the cable around the apartment / office.
Cons of the method:
Need to purchase HomePlug AV adapters.
As you can see, not only TVs can be connected in the indicated ways, but also any equipment located remotely from the router (computers, laptops, etc.).
Over the past few decades, the center of family entertainment has been television. Once there were very few channels, and there was practically nothing to watch on them. Gradually, technologies improved, new standards appeared, the number of channels increased, and characteristics improved. Bulky cathode ray tube televisions have been replaced by thin plasma panels.
TV can do a lot more than you thought
In parallel with all this, the Internet was actively developing, and television in its usual form began to fade into the background. More and more people began to draw information and watch movies online. Thus, there was a need to radically change something in the television industry. And one of these changes was the invention of smart television - Smart TV.
By and large, with its introduction, the use of television has gone beyond watching TV channels. A large number of modern models have either a wired Internet port or a Wi-Fi module. Now you can go online, watch movies, videos and even TV channels. There are various services that allow you to get all the content from the network.
Many users, having bought such a model, do not know about its network capabilities. Therefore, we will analyze how to connect a TV to the Internet. The settings differ from manufacturer to manufacturer, but the principle is the same for everyone.
Wired connection
Connection via cable is considered the most stable, it does not interfere with any interference. To do this, you will need the actual network cable and router. The only drawback is the need to run the cable across the room. Therefore, if possible, place the access point closer to the TV.

Ethernet cable
Automatic IP acquisition
Usually, the router distributes IP addresses automatically. If you are already using it on a PC, connect the TV and the router via a network cable by plugging one end into the TV connector and the opposite end into the LAN port of the access point. If everything is successful, the system will notify you about the successful connection. In selective cases, the procedure should be started manually. To do this, in the network settings, click "Set up Internet", and wait until the settings are received and saved. Try watching YouTube movies to see if it works.
Manual connection setup
Sometimes it may happen that the connection failed. After connecting the network cable, go to the network settings section. The parameters received from the router should be displayed on the screen. If the Internet does not work with them and you cannot watch movies, use the router's web interface in the "Filtering by MAC address" section to fix a permanent IP for the TV. In the TV settings, select the "Manual setup" item, enter the data from the router. Save your settings and check if it works.
PowerLine adapters (PLC)
You don’t want to spoil the appearance of the room after the repair, but you can’t place the router closer? Use a pair of PowerLine adapters. With their help, you can connect the TV to the router through the mains without the need to run a cable across the room. Plug one adapter into a power outlet and connect to an access point via a network cable. Plug the other adapter into the second outlet and connect it to the TV already. The required conditions are to be plugged directly into the outlet, not into an extension cord, and that no electrical equipment is connected between the adapters. Among the shortcomings, one can name a rather high price, the average price of one device is at least 1000 rubles.

Wireless connection
Built-in WiFi
Smart TVs are equipped with a Wi-Fi module. To watch movies online, you will not need to run a cable, just deploy a Wi-Fi wireless network at home and make a connection. Go to the TV menu, select "Network settings". After starting the setup wizard, select "Wireless connection", select the Wi-Fi network with the remote control, enter the password and click "Connect". Actually, there is nothing complicated, the whole procedure will take a maximum of a couple of minutes. Again, if for some reason the TV could not pick up the assigned IP, enter it manually according to the analog described in the previous paragraph.
You can also connect to Wi-Fi via WPS. Press the button on the router, mark the corresponding item in the TV menu. You don't have to enter any password, the network will be detected automatically.
External WiFi
Older models may not have built-in Wi-Fi. In this case, you will have to purchase an external adapter. It is not very expensive. Check out the characteristics of the device, since not all models are able to function with all TVs. Such a Wi-Fi adapter looks like a USB flash drive and is inserted into the USB port of the TV. After the system recognizes it, configure the device by analogy with the previous paragraph.

Additional router
How to connect a TV to the Internet if it is not possible to buy a Wi-Fi adapter, and the main router is rather weak and a weak signal reaches the TV? You can expand the connection using an auxiliary router. Buy the cheapest model. Set the main router to automatically assign IP, in the settings of the second one, specify "Dynamic IP". The auxiliary router will act as an amplifier at the same time. After the settings, connect the second Wi-Fi router to the TV via a cable. How to fix it, you already know. After all the installations, watching movies will become very easy.
Conclusion
Now you know how to connect your TV to the Internet. We have looked at different ways. There is nothing difficult in any of them. Look at your capabilities and features of the location of the equipment. Better and easier to set up modern models with built-in Wi-Fi.
Considering that viewing content will consume a lot of Internet channel resources, take care of a high speed tariff plan, as well as sufficient router power. Be sure to properly position the equipment so that nothing interferes with signal reception. If possible, we recommend creating a connection via a cable. This is the most reliable option.
Do you use the Internet on TV? How did you connect it? Share with us in the comments.
Modern televisions may well replace the computer display. But how is the computer to the TV?
We have compiled various ways to solve this common problem.
Connection selection

First, attention will be paid to the best options regarding image quality, with which you can easily connect. After that, several additional methods will be given.
There is a possibility that the user will need to buy a cable in the store. Usually it is not very expensive, and various devices can be purchased at a specialty radio store or a retail chain that sells consumer electronics.
Please note that the presence of gold plating on expensive cables does not affect the quality of the displayed image.
So, here are a few options for connecting a computer to a TV:
- HDMI- ideal, because to work with it, you just need to connect the connectors. As a result, not only the sound, but also the image will be well transmitted. Only one problem is possible - sometimes it may not work from a laptop.
- VGA- one of the easiest to implement ways to connect television. To do this, you only need a cable that is sold complete with monitors. There is a possibility that the user has an unused device at home. If necessary, you can buy it in a specialized store.
- With cable from DVI things are the same - to work with it, you only need to buy an adapter and a cable.
- Alternatively, you can use a composite cable S-Video. You can work with it both through a cable and through an adapter. That's just it is considered not the best way to connect, because the image may not be very clear. So such a connection does not apply if there is modern technology. The connection is the same as when working with consumer players.
Connecting with HDMI
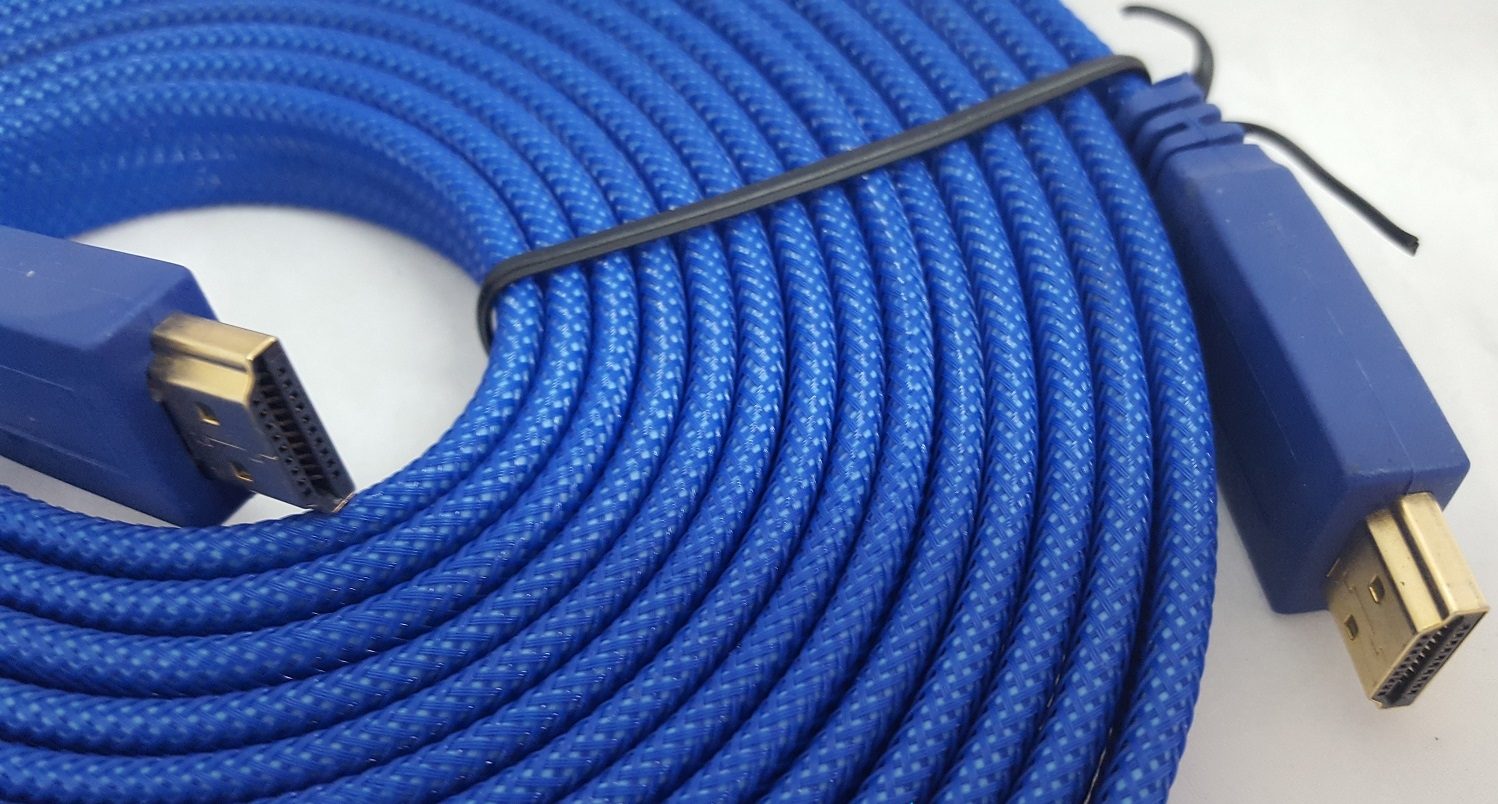
Surely many users have heard about this connector. It is on all modern TVs.
An HDMI cable has the same connectors on both ends.
You can buy a cheap cable. But if the user plans to work in 3D mode, it is better to use the latest version of the HDMI cable.
Look carefully, a similar socket is located on the video card near the monitor connection.
If there is no discrete graphics card, the socket will be located on the motherboard, that is, near the USB port. However, it will look the same.
With a laptop, everything is much simpler - it has the same HDMI socket. That's just it is on different sides, depending on the model with which the user works.
Sometimes the TV hangs on the wall and it is very difficult to insert the cable from behind. It is for this situation that a cable with plugs at right angles is sold.
Alternatively, buy a dedicated HDMI corner.
VIDEO: How to connect a computer to a TV via HDMI
How to connect a computer to a TV via HDMI
Connecting a TV to a computer via a VGA connector
Video Graphics Array is an interface designed to receive and transmit analog video signals. Sound transmission in this option of connecting a TV to a computer is completely absent.
Before connecting, make sure that both devices - both the computer and the TV - are equipped with VGA connectors and that a special cable is available.

To make such a connection, your computer must be equipped with an operating system of at least .
Connect the PC and the TV with a VGA cable in the off state, then press the SOURCE button on the TV remote control (in some models it may be INPUT) and in the menu that appears on the screen, specify as an external signal VGA(on some models - PC or RGB).
After that, confirm the selected changes by pressing the OK button.

Right-click on an empty space on the desktop and in the drop-down list go to the menu.
In this menu, you are given the choice of using both a TV and a computer monitor, as well as setting the required resolution.
In addition, you can select the option to use multiple screens, in which the following options will be available to you:
- Duplicate Screens- a function that allows you to get the same image on the monitor and on the TV screen;
- Expand screens- will allow you to simultaneously watch a video on a TV screen, and, for example, print text on a computer;
- Display desktop 1 or 2- this function operates only one of the available screens - either a monitor or a TV.
In general, the process of such a connection is not difficult, however, it creates some inconvenience associated with the transmission, in this version, of sound.
It will have to be connected with a separate cable or use an external speaker system for this purpose.
S-video
Another option for connecting a TV to a computer is to connect using S-Video connectors.
This option is convenient because all TVs and computers (except very old ones) are equipped with an S-Video connector.
All that is required of you is to connect these devices with an S-Video - S-Video cable.

Before connecting, both the TV and the computer must be de-energized, after that, insert one end of the cable into the connector on the computer's video card, which is a round black socket, and the other into the S-Video socket on the TV.
During the loading of the operating system on the computer, the TV screen will blink - thereby indicating that an external signal source has been detected.
The next step is to set up the video card. To do this, click on the free space on the desktop and in the menu " Properties» go to tab « Options» .
Then choose the item « Additionally» and in the window that opens opposite the name of the video card, activate the item « Clone» .
After applying this parameter, click on the item « Display" and from the available list, select the name of the TV.
Then on the TV, search for the signal source and adjust the image.
Miracast

Miracast technology differs from DLNA in that such an option for displaying multimedia information from a TV to a PC simplifies the task of viewing not only recorded files stored on the gadget’s hard drive, but also played online on one of the built-in ones.
That's just the Miracast technology has the only drawback - it is very demanding on computer resources.
So it is supported only by individual computers, as well as tablets and laptops that have powerful hardware stuffing.
It is important to implement such modern technologies in the TV itself.
If the TV only optionally supports Miracast, then you will have to spend extra money on an adapter that easily connects to the HDMI port.
The wireless monitor technology is very simple - the displayed image is compressed using a special algorithm.
After that, it is mirrored via Wi-fi to a large TV display.
In this case, there is no need to connect the TV to one of the local networks using a router.
Thanks to the receivers, a separate mini-network is organized, which simplifies communication with a PC.
To successfully transfer the image, install the Wireless Display add-on on your computer and start broadcasting.
Make sure that the Miracast function is activated in the TV menu. This can be done in the settings if you enter the tab "Networks" and go to the sub-item Intel WiDi.
VIDEO: We connect the smartphone to the TV via Miracast
We connect the smartphone to the TV via Miracast
PC and Smart TV connection
As many of you probably know, a home network can be created without the use of a router. In this case, the role of the access point will perform.
This is done in several ways:
- You can create a connection in one of the dedicated management consoles;
- Alternatively, use ;
- Use third-party programs, for example, Virtual Router Plus.
Keep in mind that most built-in Windows tools are more reliable and stable.
In addition, users no longer have to waste time searching for programs and installing them on a personal computer. So the registry will not be too clogged.
This method is considered one of the simplest.
Logging in as an administrator, proceed to launch the command line. To cope with this Windows 8 task, use the key combination Win + X.
When the menu appears, select "Command Prompt". In the seventh version of the operating system, you must press the key combination Windows + R in the window that opens, and also write cmd and press Enter.
Be sure to write the following command netsh wlan set
and after that press Enter .
After that, the creation of a new network will be completed and you can start launching it. To do this, write on the command line
hostednetwork
It is important to say that you can create a virtual network only once.
However, after the module is reloaded, the user must enter a command to successfully start the Internet.
As a result, the user will only have to connect to the computer by performing the necessary steps that have already been done when working with the router.
You can control TV from a PC via a Wi-Fi wireless network using the same programs.
Various add-ons are known, with the help of which it is much easier to control the TV using a smartphone.
In this case, the phone is used as a control.
So, this article shows the main ways to connect a computer to a TV.
It is very easy to cope with this task if you choose the appropriate option and follow the instructions given. Then the user will not have any difficulties with the connection.
VIDEO: We connect a TV with Smart TV to a computer (Wi.Fi - Lan) - using WINDOWS
We connect a TV with Smart TV to a computer (Wi.Fi - Lan) - using WINDOWS
Image Adjustment
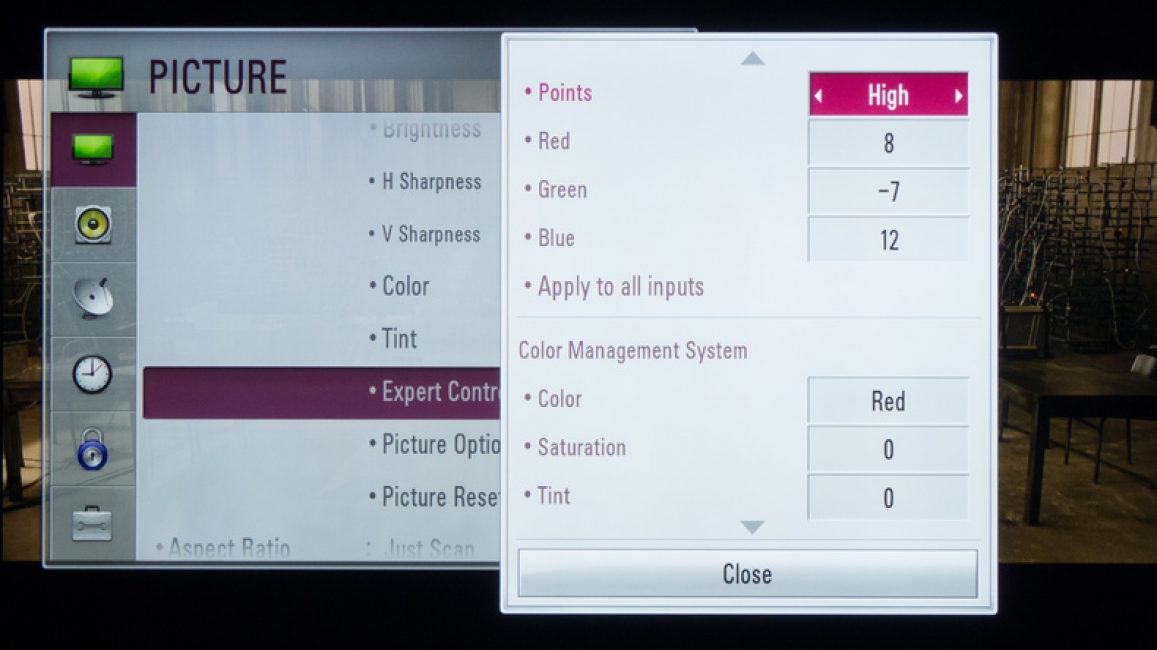
If the image is blurry, you should open the system settings and find the section that is responsible for.
Here the user can set the required resolution to match the TV. If necessary, you can change the mode in which the video is displayed.
Most modern smart TVs can be connected to a PC wirelessly using a local wi-fi network.
This helps to broadcast a variety of content - music, video, and so on.
If necessary, you can easily duplicate images downloaded from your computer to your TV.
As a result, the latter will turn into a high-quality analog of a wireless monitor. In addition, when working with wi-fi is not needed.
As for the LG device, you can use the service to activate this function. Smart Share
AllShare program
There is a big difference in wireless settings between TV models from different manufacturers.
Most devices are able to establish a connection automatically. To work with others, you need to install additional software on the connected .
So it may be difficult to formulate a universal instruction suitable for all users.
If you need to connect a TV to a PC via, you can find the necessary information by reading the instructions, or by going to the manufacturer's official website.
There you can also find the answer to the question of what software is needed for this.
Combination of different outputs

Sometimes it happens that the equipment does not have the necessary connectors. It often happens that there is one port on the TV, and another on the computer.
How to be in that case? Very simple - you just need to unite which connectors will be used and purchase the right cable.
Alternatively, use special converters that simplify the connection of various ports.
You can use the VGA converter, which receives signals from the VGA output of the gadget.
After that, the signals are converted for the most common S-Video for TVs.
When turning off, follow this order:
- TV and computer should be disconnected from the network;
- Don't forget to disconnect the antenna and peripherals;
- Connect cables if you plan to use adapters;
- It is important to connect the computer as well as the TV to the network.
- Next, you need to turn off the computer and wait for the system to fully boot;
- Only after that you can start turning on the TV.
By clicking the right mouse button, the user will see a context menu in which to find the item "Screen resolution" . In order for the system to be able to connect the TV, you must press "Find" .
Selecting an item "Multiple Screens" , the user must configure the output of images:
- Screen duplication - in this case, the same information will appear on the TV as on the computer screen;
- When expanding the screens, the display of the computer and the TV will form a common work area;
- Half desktop display means that the image will be displayed either on a TV or on a computer.
| Connection method | How to do |
|---|---|
| Connecting a TV using the VGA connector | With this connection option, a separate audio signal output is required. |
| Connecting with an S-Video connector | Pretty simple and not expensive way to connect. Due to the fact that most devices have an S-Video connector, it can be used as the main connection option. |
| Connecting a PC using HDMI | You can buy a cheap cable. But if the user plans to work in 3D mode, it is better to use the latest version of the HDMI cable. Next, you should find the HDMI jack, which is located on the back of the computer or TV. |
| Miracast Technology | Miracast technology differs from DLNA in that this option for displaying multimedia information from a TV to a PC simplifies the task of viewing not only recorded files stored on the gadget’s hard drive, but also played online on one of the built-in web browsers. |
| Connecting PC and Smart TV without a special router | Keep in mind that most built-in Windows tools are more reliable and stable. In addition, users no longer have to waste time searching for programs and installing them on a personal computer. So the registry will not be too clogged. This method is considered one of the simplest. Further, this issue will be considered in more detail. |